How to CLONE yourself with a moving camera! | Video editing VFX tutorial

  • Видео
  • О видео
  • Скачать
  • Поделиться

How to CLONE yourself with a moving camera! | Video editing VFX tutorial

► My Top 10 Tips for making your best film on a budget: https://youtu.be/pXdUiwho6u0 Steve Ramsden here from DIY Moviemaking and this week I’m going to show you how to create a clone effect with a moving camera, even if you’re working with a low budget! and in case you were wondering, no green screen was used, just masking and roto brush! So a clone effect where the camera doesn’t move is the most basic version of this effect possible. Buster Keaton was doing this 100 years ago and it’s very easy for you to do as well. Just put your phone or camera on a tripod, appear in one side of the frame acting one role, move to the other side and act the other role, and then line up the two shots on top of eachother in your edit program and crop off the side of one of the shots. You usually get better results with a softened or feathered edge, and as long as you don’t move around much nobody notices the join. But the real clever development was when people worked out how to do this effect using motion control, and this is the sort of shot you can see in films like Back To The Future 2 and 3 and The Man in the Iron Mask, where you would still have one actor playing two parts, but the camera would be programmed to do exactly the same movement every time (ILM used the VistaGlide in BTTF). Different parts of the shots could then be cut out to make the joins difficult to spot, and suddenly, the fact that the camera is moving stops your brain from looking for that join and you believe the end result much more. Now if you’re thinking you need an expensive motion control system to try this effect yourself, you don’t, and I’m going to show you my fun way of attempting this effect on a serious budget. I’ve worked out a way of getting a pretty good result using noting but a fairly cheap camera slider which is just a rail that you push your phone or camera along manually. If you set one end of the slider a little lower, the camera will roll down a slight gradient and you can basically use gravity to get the same movement again and again. All you have to do is to get a friend to let go of the camera when you want the move to begin. Now although we can get the camera to slide on its own, it won’t be able to pan or tilt, and so we will need to add any other camera movements artificially when we edit. So for this reason, frame the shot a bit wider than what you will need, and ideally film in a higher resolution as well. I shot in 4K as I was going to make the finished shot in HD. So in this video I’m going to show you two versions of this DIY motion control clone effect - firstly a basic version where the figures stay still and don’t overlap, and secondly a more difficult version where they move around and they do overlap. I’m building these shots in Adobe After Effects and as usual I’m just going to give a quick overview of my editing, but if you want to learn every single process I am using from scratch in full detail, you can of course check out my After Effects Essentials course, and the link to learn more about that is above. ▼ Timestamps ▼ 00:00 Intro 01:32 DIY motion control 02:23 Two versions 02:53 Basic version 04:44 Difficult version 12:07 Finished result
210, 451   |   3 год. назад  |   10, 638 - 0
 

How to CLONE yourself with a moving camera! | Video editing VFX tutorial

Скачайте изображение (превью) выбрав качество


320x180 480x360 640x480 1280x720

► My Top 10 Tips for making your best film on a budget:

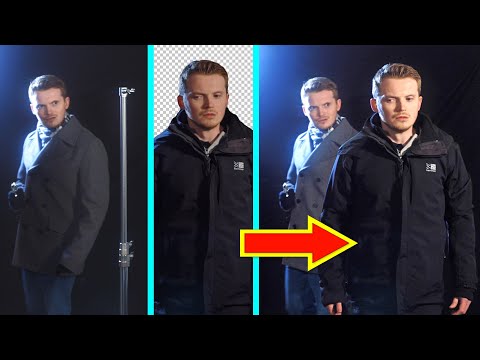
Steve Ramsden here from DIY Moviemaking and this week I’m going to show you how to create a clone effect with a moving camera, even if you’re working with a low budget! and in case you were wondering, no green screen was used, just masking and roto brush!

So a clone effect where the camera doesn’t move is the most basic version of this effect possible. Buster Keaton was doing this 100 years ago and it’s very easy for you to do as well. Just put your phone or camera on a tripod, appear in one side of the frame acting one role, move to the other side and act the other role, and then line up the two shots on top of eachother in your edit program and crop off the side of one of the shots. You usually get better results with a softened or feathered edge, and as long as you don’t move around much nobody notices the join.

But the real clever development was when people worked out how to do this effect using motion control, and this is the sort of shot you can see in films like Back To The Future 2 and 3 and The Man in the Iron Mask, where you would still have one actor playing two parts, but the camera would be programmed to do exactly the same movement every time (ILM used the VistaGlide in BTTF). Different parts of the shots could then be cut out to make the joins difficult to spot, and suddenly, the fact that the camera is moving stops your brain from looking for that join and you believe the end result much more.

Now if you’re thinking you need an expensive motion control system to try this effect yourself, you don’t, and I’m going to show you my fun way of attempting this effect on a serious budget.

I’ve worked out a way of getting a pretty good result using noting but a fairly cheap camera slider which is just a rail that you push your phone or camera along manually. If you set one end of the slider a little lower, the camera will roll down a slight gradient and you can basically use gravity to get the same movement again and again. All you have to do is to get a friend to let go of the camera when you want the move to begin.

Now although we can get the camera to slide on its own, it won’t be able to pan or tilt, and so we will need to add any other camera movements artificially when we edit. So for this reason, frame the shot a bit wider than what you will need, and ideally film in a higher resolution as well. I shot in 4K as I was going to make the finished shot in HD.

So in this video I’m going to show you two versions of this DIY motion control clone effect - firstly a basic version where the figures stay still and don’t overlap, and secondly a more difficult version where they move around and they do overlap. I’m building these shots in Adobe After Effects and as usual I’m just going to give a quick overview of my editing, but if you want to learn every single process I am using from scratch in full detail, you can of course check out my After Effects Essentials course, and the link to learn more about that is above.

▼ Timestamps ▼
00:00 Intro
01:32 DIY motion control
02:23 Two versions
02:53 Basic version
04:44 Difficult version
12:07 Finished result

How to CLONE yourself with a moving camera! | Video editing VFX tutorial

Чтобы скачать видео "How to CLONE yourself with a moving camera! | Video editing VFX tutorial" передвинте ползунок вправо


Покажите вашим друзьям, добавьте в соцсети

Ссылка на страницу с видео:


Ссылка HTML на страницу с видео:


Код для вставки плеера:


  • Комментарии

Комментарии ФБ


Уважаемые друзья!

Источником всего видеоконтента, в том числе проигрывающегося на страницах ресурса ruslar.me, является сторонний видео ресурс, а именно общедоступный видеохостинг YouTube.com, предоставляющий открытый доступ к своему видеоконтенту (используя открытую и общедоступную технологию video API3 youtube.com)!

Проблемы с авторскими правами

Если вам принадлежат авторские права на данное видео, которое было загружено без вашего согласия на YouTube.com, перейдите на страницу этого видео сайта YouTube.com , нажмите на ссылку под проигрывателем Ещё -> "Пожаловаться" -> "Нарушение моих прав" и в выпадающем меню, выбирите, что именно нарушается и нажмите кнопку "Отправить".


Неприемлемый контент

Чтобы сообщить о неприемлемом видео, перейдите на YouTube, нажмите на ссылку под проигрывателем Ещё -> "Пожаловаться" и выберите в "Сообщить о нарушении" что именно вас не устраивает в этом видео. Подробнее о наших правилах читайте в Условиях использования.